 Save
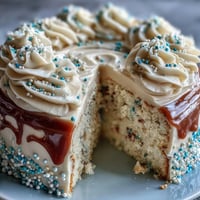
Save The kitchen counter was covered in flour dust, red streaks of food coloring everywhere, and my roommate Sarah leaning against the doorway asking if we were making a cake or committing a crime. It was her birthday, and she had mentioned offhandedly that red velvet was her childhood favorite, the kind her grandmother made every Sunday after church. I had never attempted it before, something about the chemistry of vinegar and buttermilk always intimidated me, but there I was, measuring cocoa powder and hoping for the best. The smell that filled our tiny apartment that afternoon was something else entirely, like chocolate wrapped in warmth, and when Sarah took that first bite later that evening, she got quiet, then smiled and said this was better than memory.
I made this cake again for my sister's wedding shower, doubling the recipe and stacking three tiers instead of two, and learned that red velvet has this way of making people slow down. My aunt, who never eats dessert at parties, actually went back for seconds, and later in the kitchen, surrounded by empty plates and women asking for the recipe, I realized something about why this particular cake matters. It is not just about how it looks or tastes, though both are spectacular. It is about how this cake shows up for the moments that count, birthdays and weddings and Tuesday nights when you just need something beautiful.
Ingredients
- All-purpose flour: The structure of your cake depends on measuring this correctly, spoon and level instead of scooping directly
- Unsweetened cocoa powder: Just enough to give depth without turning this into a chocolate cake, the cocoa here is subtle and sophisticated
- Baking soda: This is your leavening agent, reacting with the vinegar and buttermilk to create that signature tender crumb
- Salt: Do not skip this, it enhances all the other flavors and balances the sweetness
- Granulated sugar: Creamed with butter until light and fluffy, this creates the tender texture red velvet is known for
- Unsalted butter: Use truly softened butter, not melted or cold from the fridge, for proper creaming
- Large eggs: Room temperature eggs incorporate better and create a more uniform batter
- Buttermilk: The acidity here is crucial, it reacts with baking soda and creates that distinctive tang
- Vanilla extract: Use pure vanilla extract, the imitation stuff cannot compete in a recipe with so few ingredients
- White vinegar: Enhances the red color from food coloring and activates the baking soda
- Red food coloring: Gel coloring gives a deeper hue with less liquid, which protects your batter consistency
- Vegetable oil: Keeps the cake incredibly moist, the oil ensures this stays tender for days
- Cream cheese: Use full fat, softened completely for that silky smooth frosting texture
- Powdered sugar: Sifting prevents lumps in your frosting and ensures a silky finish
Tired of Takeout? 🥡
Get 10 meals you can make faster than delivery arrives. Seriously.
One email. No spam. Unsubscribe anytime.
Instructions
- Preheat your oven:
- Set to 350°F and generously grease two 9-inch round pans with butter, then dust with flour, tapping out any excess
- Whisk the dry ingredients:
- Sift together flour, cocoa powder, baking soda, and salt in a medium bowl, breaking up any cocoa clumps
- Cream the butter and sugar:
- Beat on medium-high speed for about 3 minutes until the mixture is pale and fluffy, scraping down the sides
- Add the eggs:
- Crack them in one at a time, beating well after each addition until fully incorporated
- Mix in the oil and extracts:
- Pour in the vegetable oil, vanilla, and vinegar, mixing until just combined
- Prepare the buttermilk mixture:
- Whisk the red food coloring into the buttermilk until evenly distributed
- Combine wet and dry:
- Add the flour mixture in three parts, alternating with the buttermilk, beginning and ending with the flour mixture and mixing until just combined
- Bake the layers:
- Divide the batter evenly between the prepared pans and bake for 28 to 30 minutes until a toothpick comes out clean
- Cool completely:
- Let the cakes rest in the pans for 10 minutes before turning onto wire racks to cool entirely, about an hour
- Make the frosting:
- Beat softened cream cheese and butter until smooth, then gradually add sifted powdered sugar, vanilla, and salt until fluffy
- Assemble the cake:
- Place one cooled layer on your serving plate, spread a generous layer of frosting, top with the second layer, and frost the top and sides
 Save
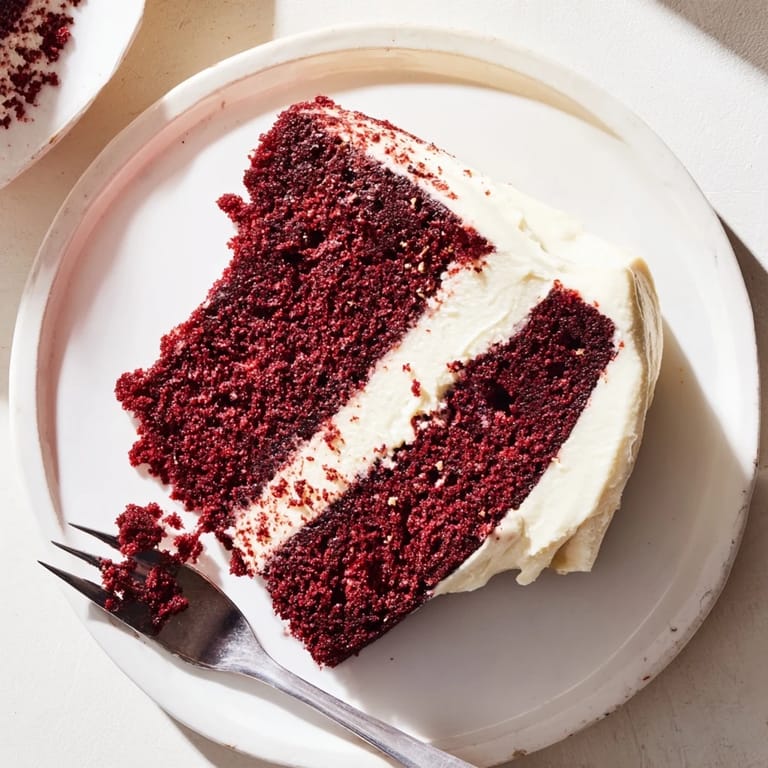
Save That first red velvet cake I made for Sarah became a tradition, something we baked together at least once a year, and I eventually learned that the mistakes and the flour-covered counters were always part of what made it special. Now when I see that deep red slice with cream cheese frosting, I think of kitchens filled with laughter and birthdays celebrated properly.
Getting The Perfect Red Color
I have tried every type of red food coloring out there, and gel coloring delivers the most vibrant hue without thinning your batter. The traditional liquid coloring works, but you need to use so much that it throws off the liquid ratios in your recipe. One tablespoon of good gel coloring gives you that striking red that makes red velvet so distinctive.
Making The Frosting Silky Smooth
The secret to bakery-perfect cream cheese frosting is temperature. Both your cream cheese and butter must be softened to the same consistency, cool enough to hold shape but soft enough to blend without lumps. I set mine out for at least two hours before baking, and if I am in a hurry, I cut the cream cheese into small cubes to speed things up.
Serving And Storing
This cake actually tastes better the next day, once the flavors have had time to settle and the frosting has softened the crumb slightly. I always bake it the day before serving and let it rest covered at room temperature.
- Refrigerate only after the cake has been cut, then bring slices to room temperature before serving
- Place a slice of bread in the container with leftover cake to keep it moist
- The frosting can be made ahead and stored in the refrigerator for up to three days
 Save
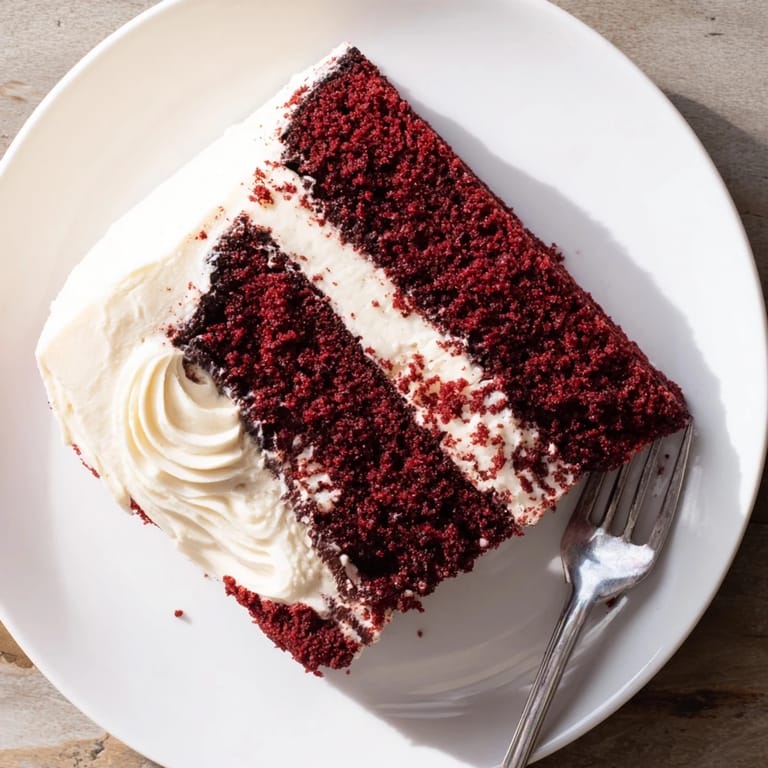
Save There is something about red velvet cake that feels like celebration, like you bothered to make something beautiful and worth savoring.
Recipe FAQ
- → What makes red velvet cake unique?
The distinctive combination of buttermilk and vinegar creates a subtle tangy flavor while the chemical reaction between these acidic ingredients and baking soda produces the cake's signature moist, velvety texture. The cocoa powder adds depth without making it chocolate-heavy.
- → Why is my cake not red enough?
Traditional red velvet relies on the reaction between acidic ingredients and cocoa to naturally develop a reddish tint. For that vibrant deep red color most people expect, high-quality gel food coloring works better than liquid versions and won't add excess moisture to your batter.
- → Can I make this cake ahead of time?
The unfrosted cake layers can be wrapped tightly and stored at room temperature for one day or frozen for up to three months. Once frosted, the cake stays fresh covered in the refrigerator for five days, making it perfect for preparing ahead of special occasions.
- → Why does my cake sometimes turn out dense?
Overmixing the batter develops too much gluten, creating a dense texture instead of the desired velvety crumb. Mix only until ingredients are just combined. Additionally, ensure all ingredients are at room temperature before mixing to promote proper emulsification.
- → What's the best way to frost red velvet cake?
Always let the layers cool completely before frosting to prevent melting. Applying a thin crumb coat first and chilling for 15 minutes helps lock in loose crumbs, then add your final thick layer of cream cheese frosting for that pristine professional finish.
- → Can I substitute buttermilk?
While regular milk mixed with one tablespoon of white vinegar per cup can work in a pinch, authentic buttermilk provides the essential acidity needed for both flavor and texture. The real thing delivers that characteristic tang and tender crumb that makes this cake exceptional.